Generic General Guide
E-Bike Owner’s Practical Guide: Choosing, Maintaining, and Repairing Your Ride
Whether you are comparing your first e-bike, tracking down a replacement part, or dealing with an overheating motor, the same principle applies: match the decision to your actual riding profile and the specific system on your bike. This guide consolidates the practical steps from our e-bike coverage into one reference you can work through in order—from pre-purchase checks to maintenance and repair.
Start With Your Riding Profile, Not the Spec Sheet
Before comparing models, write down three inputs: terrain (flat pavement, rolling hills, steep grades, or off-road), trip distance (daily commute plus occasional longer rides), and your weight plus regular cargo such as bags, child seats, or groceries. Also note where you store the bike—ground-level garage or up stairs—since weight and carrying effort matter. This profile determines which specs are hard requirements versus preferences, and it makes the rest of your comparison straightforward.
Compare E-Bikes on the Specs That Change the Ride
When matching one bike against another, prioritize these five specs:
- Motor type and continuous power—use the continuous rating, not peak. Hub motors suit flat ground; mid-drives are the choice for hills and off-road.
- Battery voltage—treat this as the single most important number. Keep voltage the same when comparing; a lower-voltage pack can leave you short on torque for hills even if watt-hours look similar.
- Battery capacity in watt-hours—compare range potential, not just amp-hours.
- Brake type—prefer hydraulic over mechanical where possible.
- Class designation—class 1, 2, or 3 affects where and how you can legally ride.
As a rule, stay within 50W of the original motor’s continuous rating and match the brake type. Specs that look similar on paper can still feel different on the road, so treat these as a shortlist filter, then test ride.
Know Which Parts Are Proprietary Before You Shop
Sort any replacement part into one of two buckets before buying. Proprietary parts are matched to a specific brand’s mounting points, wiring, and electronic tuning—batteries, chargers, motor controllers, and display units typically fall here. A generic battery pack may not seat properly or communicate with the controller, and a charger with the wrong voltage or connector can damage cells. Universal parts—chains, cassettes, brake pads, derailleurs—are largely shared with non-electric groupsets, though e-bike-specific versions with reinforced pins exist to handle motor torque. For Shimano STEPS systems, drivetrain and brake components cross over from standard Shimano groupsets, but drive units, batteries, displays, wiring harnesses, and chargers are proprietary and cannot be substituted across brands.
Verify Compatibility Before Ordering
For niche or performance brands, parts availability fluctuates and compatibility is not always obvious from a product listing. Confirm the electrical system voltage of your model, the connector type, and the model year before ordering, and verify fitment yourself rather than relying on a listing title. When in doubt, describe the symptom and your bike’s exact model to the seller instead of guessing at a part number.
Diagnose and Fix TSDZ2 Overheating
The TSDZ2 mid-drive can hit thermal shutdown on long climbs or heavy loads. Common causes: factory thermal paste applied thin or unevenly, leaving air gaps between the stator and housing; a sealed housing with little airflow; and sustained high power in low-speed, high-torque situations. The effective fixes are replacing the thermal paste between the stator and casing, and adding controlled ventilation that lets hot air escape without admitting water or debris. If the motor cuts power on climbs, treat it as a heat symptom first—reduce continuous load and address paste and airflow before replacing components.
Assembly and First-Ride Checks
For kit-based builds, unpack on a clean, well-lit surface and lay out all components against the packing list. Inspect each part for shipping damage—dents, scratches, loose connections—paying special attention to the frame, handlebars, and wiring. Cross-reference the manifest before starting assembly, and handle sensor modules with care since many are sensitive to electrostatic discharge and physical shock. Complete a verification checklist before the first ride: all fasteners secure, cables routed clear of moving parts, brakes responsive, and lights and display functioning.
Modification Safety and Legal Boundaries
Modifying an electric dirt bike or scooter takes you beyond the manufacturer’s intended specifications. Overloading components, improper wiring, or exceeding the frame’s structural limits can cause sudden failures. Any modification voids the original warranty and places responsibility for safety on the rider. Before starting, confirm local regulations for your vehicle class, use proper tools, and rely on official documentation and electrical fundamentals rather than forum guesswork alone.
Sources used
- /how-to-compare-e-bikes-framework/
- /finding-ebikes-similar-to-the-a-comparison/
- /finding-rize-electric-bike-parts-a-guide-for-owners/
- /finding-shimano-electric-bike-parts-a-guide-for-owners/
- /finding-talaria-electric-bike-parts-a-guide-for-owners/
- /tongsheng-tsdz2-overheating-fix/
- /how-to-assemble-your-electron-and-co-razor-kit/
- /how-to-assemble-your-co-kit-for-optimal-performance/
- /how-to-safely-modify-your-razor-electric-dirt-bike/
Pages consolidated here
- how to compare e bikes framework
- finding rize electric bike parts a guide for owners
- finding shimano electric bike parts a guide for owners
- finding talaria electric bike parts a guide for owners
- tongsheng tsdz2 overheating fix
- finding ebikes similar to the a comparison
- how to safely modify your razor electric dirt bike
- razor pro spec finding the best price
- how to assemble your electron and co razor kit
- how to master your power ride university experience
- how to assemble your co kit for optimal performance
- how to choose a rider training course
- how to master moto drifting techniques safely
- finding seat covers for the e box 20
- how to upgrade your razor scooter with new kits
- what are rock batteries and how do they work
- razor rambler 12 how to charge your electric bike
- how to upgrade your razor scooter
- how to properly store your lawn mower in the garage
- diy lawn mower go kart conversions a guide
- how to use the embsx mower blade sharpener
- how to safely transport your electric bikes
- how to use a manual roller effectively
- finding and using your dyson instruction manual
- how to make your go kart go faster
- finding replacement tricycle seats
- how to get a free riding mower
- how to safely start your riding lawn mower
- understanding amp glow what it is and how to achieve it
- finding free riding lawn mowers in your area
- what are boat skates and how do they work
- how to secure your saddle with a lock
- finding a sage green bicycle
- how to replace a shield plug in your equipment
- finding electracraft electric boats for sale near you
- how to convert miles to miles per hour
- finding the price of the cyber beast
- save on your e ride pro finding available promo codes
- finding batteries at toys r us for your toys
- how to say ride in english common phrases
- how to activate your electric longboard
- best bikes for 11 year olds finding the right fit
- how to choose the right bicycle for your needs
- finding replacement parts for drive walkers
- how to use your lcover effectively
- how to operate a lawn mower effectively
- finding the right power adapter for peru
- finding quality used lawn equipment at reds
- boss pedal dimensions finding the right fit
- how to cycle faster tips for improving your speed
- finding the cheapest self propelled lawn mowers
- how to use a kick bot effectively
- how to drift cycle safely
- how to build with packed mud
- troubleshooting how to safely remove obstructions from the road
- finding the most affordable riding mower for your yard
- diy guide how to build a racing lawnmower
- how to order scooters online a step by step guide
- how to safely transport your lawn mower
- mass save lawn mower rebate how to save money
- finding the right tricycle for older children
- finding the right fender extension for your vehicle
- roboter shops finding the best place for robots
- finding free mopeds realistic options and considerations
- how to properly handle a trike
- craftsman self propelled mowers a how to guide
- how to use moving rollers for heavy furniture
- finding the smallest riding mower for compact yards
- finding the right lawn mower for cemetery care
- how to safely use and maintain your plug away 2 device
- finding street legal two seater scooters
- correct pronunciation how to say segue
- finding childrens bicycles at toys r us
- finding tricycle deals and sales in the philippines
- how to start your go power lawn mower
- how to build a racing lawn mower a diy guide
- finding the smallest riding lawn mowers for your yard
- how to use a push mower safely and effectively
- finding the right white push mower for your lawn
- rodeo premier what it is and how to participate
- finding deals at global moto outlets
- fixing your cycle seat shock absorber a guide
- how to use speedkick for enhanced performance
- how to responsibly dispose of your old riding mower
- how to safely change blades on your tools
- how to use a yard rake for better lawn care
- how to replace trimmer line for effective yard work
- finding affordable hoverboards budget options under 50
- navigating public transport how to use the navigo pass
- finding the ultimate lawn mower for your yard needs
- go karts for adults finding the perfect ride
- finding ride on lawn mowers for sale your options
- how to safely change your lawn mower blade
- how to order a scooty a simple step by step process
- finding riding lawn mowers on wayfair for your home
- finding the best electric scooter prices in your area
- finding parts at a lawnmower boneyard
- where to find a ninebot go kart for sale
- finding free lawn mowers tips and resources
- how to master trail braking in f1 24
- how to convert your bike to electric diy kits
- revo genie features and how to use it
- finding the perfect pink adult tricycle
- finding the most comfortable trike seat for your ride
- how to use a fox racing shox shock pump
- finding the perfect red tricycle for adults and kids
- finding replacement parts for your leo pump
- how to ride your bike on a gravel beach safely
- eagle size comparison finding the perfect fit
- affordable speed finding fast yet budget friendly ebikes
- how to use your genie model a step by step guide
- bikes for adult women finding the perfect fit
- bicycles with high weight capacity finding the right fit
- finding the cutest beach cruiser bikes
- how to use a mini air pump for your dogs needs
- finding the best scooter deals and offers
- finding great deals on scooters at woot
- finding the smallest mobility scooters a buyers guide
- finding affordable fast electric scooters
- how to use red loctite for secure fasteners
- how to safely ride your electric scooter in the snow
- finding replacement parts for your aovo pro scooter
- finding scooter batteries at walmart
- how to perform basic scooter tricks
- how to ride an ice chest a fun summer activity
- how to ride an electric skateboard safely
- scooter repair common issues and solutions
- lime mopeds how they work and where to find them
- finding discounts on mosquito repellent products
- how to use loctite red threadlocker
- how to use a wireless air pump for inflatables
- where to find squid game inspired shorts
- how to secure your electric scooter
- how to wrap your ride for a custom look
- how to use a craftsman portable air pump
- how to safely operate an electric scooter
- finding replacement parts for your skute scooter
- finding the right handlebar height for your scooter
- how to start a scooty without the key troubleshooting tips
- finding promo codes for lime scooter rentals
- how to safely modify your electric scooter
- how to make your electric scooter go faster safely
- how to charge your electric scooter safely
- how to configure your own mountain bike
- metropolis cycle repair common issues and solutions
- tips for maintaining your ridstar electric bike
- how to find the right sx model for you
- how to plan your smartest cycling route
- how to increase your kilometers traveled safely
- finding your corratec frame number a guide
- how to connect komoot for enhanced navigation
- how to improve your bicycle riding skills
- how to haul long distances with your bike
- how to charge your electric vehicle safely and efficiently
- finding a pink unicycle options available
- how to experience a dragster ride
- x pro go kart parts where to find them
- finding the cheapest ready to run rtr options
- finding the perfect pink pit bike for fun
- what is a sorn car and how do you declare it
- finding a mini moto shop near you
- how to find your ecobee thermostat model number
- how to properly charge your super 73 e bike
- finding batteries made in the usa
- how to charge your electric bicycle
- how to make delicious turon a step by step recipe
- finding scooters that can reach 80 mph
- finding powertrain discounts tips for savings
- schwinn bicycle prices finding the best deals
- soarin ride vehicle how it works and where to find it
- finding pictures and images of suran
- affordable urban mobility finding the best cheap city bikes
- what is a sarong and how to wear it
- finding the fastest and cheapest electric dirt bikes
- electric cruiser bikes finding the perfect ride
- how to learn dirt biking essential training tips
- illinois e bike rebate program how to qualify
- honda 70f dirt bike where to find one for sale
- illinois e bike rebate program how to save
- finding e bike grants and rebates
- finding affordable electric scooters budget friendly options
- how to order a tesla electric bike if available
- finding the best ebike coupons and discounts
- how to use an ebike for flyer distribution
- how to master the speed kick in martial arts
- how to use a mountain bike manual machine
- finding affordable dirt bikes under 300
- finding discount codes for speed cube shops
- finding e bike military discounts
- how to restore an old bicycle
- how to set sag on your dirt bike
- how to safely move your bicycle
- how to perform a vin check
- how to safely remove bike pegs a step by step guide
- how to find free electric scooters
- finding the smallest electric riding lawn mower
- how to build an electric bike for under 100
- how to safely remove road bike pedals
- finding the best bike with a comfortable seat
- how to maintain your ecvt bike system
- finding the right womens teal mountain bike
- finding purple bike parts for customization
- finding affordable and fast electric bikes
- finding the cheapest electric mountain bikes
- how to maintain your fox dirt bike shocks
- cruiser bike sizing chart finding your perfect fit
- finding the best e bike combo deals for your purchase
- finding the perfect pink and white bicycle
- essential tools for maintaining your dirt trails
- finding the cheapest electric tricycles budget options
- finding a comfortable bicycle for your needs
- finding electric bikes in long beach
- road bike shoe size chart finding the perfect fit
- finding used mini bike frames for your project
- finding the most comfortable electric bike for your ride
- finding affordable pedals for your dirt bike
- how to replace your bike stem a step by step guide
- how to replace your electric scooter handlebars
- finding electric scooters at costco
- how to use a small electric air pump effectively
- how to master electric drifting safely
- finding the cheapest 40 mph electric scooter
- finding a two seater electric moped for two riders
- how to properly use a key lock for your bike
- how to properly charge your electric scooter
- how to safely increase electric scooter speed
- how to ride your ebike in winter
- finding and using your e bike user manual
- how to remove a bike headset properly
- e bike costs what to expect and how to save
- finding sur ron suppliers where to buy parts and bikes
- finding a pink road bike
- how to upgrade your sur ron suspension
- finding the best bike shop in the outer banks
- how to safely remove bike pegs
- how to drive a dirt bike essential beginner tips
- finding sur ron parts or accessories under 100
- finding dirt bikes under 200 realistic expectations
- urban e bike comparison finding the best commuter model
- finding a qualified mechanic for your bike
- where to find electric bikes in stock
- finding the right dirt bike size for adult riders
- is the available at costco finding deals
- finding the perfect hot pink mountain bike
- dirt bike cc chart finding the right engine size
- finding mini bikes suitable for riders up to 300 pounds
- how to choose the best electric bike for your needs
- finding affordable electric bikes with high performance
- finding reputable electric bike websites
- how to properly charge your electric bike
- how to order your electric bike
- finding a pink lbx electric bike
- how to buy a electric bike a step by step guide
- finding a pink electric bike
- finding a lbx electric bike for sale
- finding sur ron electric bikes around the 1000 price point
- finding the most affordable sur ron electric bike options
- finding the most affordable electric bike
- how to charge my bull evo lite wave e ebike safely
- how to enhance your haibike experience with a dongle
- how to register your haibike for warranty
- how to connect your electric bike to a cougar chariot
- finding parts for your e glide electric bike 2
- finding biria bike parts a resource for owners 2
- finding bintelli bike parts a guide for owners 2
- finding zugo bike parts and accessories
- how to fold your tern bike a step by step guide
- tern bike sizing guide finding the perfect fit for your folding or car
- how to assemble your new schwinn electric bike a step by step guide
- haibike sizing guide finding the perfect fit for your e mtb or trekkin
- how to fold your emojo electric bike a step by step guide
- eahora electric bike parts where to find replacements and upgrades 3
- finding accessories for your e joe electric bike
- finding biria bike parts a resource for owners
- finding bintelli bike parts a guide for owners
- how to assemble your new eahora electric bike a step by step guide 2
- troubleshooting common eahora e bike issues a diy guide 2
- eahora electric bike parts where to find replacements and upgrades 2
- how to fold your jetson electric bike a simple guide 2
- how to make your jetson electric bike faster tips and tricks 2
- how to charge your jetson electric bike a step by step guide 2
- how to fold your jetson electric bike a simple guide
- how to assemble your new eahora electric bike a step by step guide
- how to find the paint code for a2b electric bikes
- how to store electric bike batteries in winter
- where to find ezip electric bikes for sale
- finding electric bikes in lancaster sc
- finding the best places to recycle electric bikes
- steps to obtain electric bike license plates
- finding the revere electric bike corporate office address
- finding the serial number on your electric bike
- finding electric bike demo locations near you
- finding the revere electric bike corporate office location
- finding local stigo electric bike retailers
- finding the best demo electric bike near me
- finding local electric bike demo locations
- how to successfully sell gently used electric bikes online
- how to prepare your used electric bike for sale
- finding a local expert who fix electric bikes
- finding reliable manufacturers of key blanks for electric bikes
- finding the best places who rents electric bikes
- finding the best technicians for bionic electric bikes
- how to reset bionic electric bikes for optimal performance
- finding electric bikes for sale in hilo hawaii
- finding local retailers who sell electric bikes in pennsylvania
- how to choose the right faraday electric bike for speed
- how to reset intelligent electric bike software
- how to reset odometer on electric bike
- steps to restore factory settings on a bionic electric bike
- how to ride an electric bike like a pro
- how to prepare your electric bike for shipping
- how to graphically represent electric bikes
- how to rent an electric bike for beginners
- how to watch electric bike riding videos online
- how to choose the right mid drive electric bike for you
- how to start your bounce electric bike journey
- best practices for how to store electric bike batteries
- how to transport a pathfinder st electric bike safely
- how to properly transport a womens electra cruiser bike on car
- how to safely turn off electric bike
- how to tighten handlebars on an electric bike
- how to properly turn off your electric bike
- how to turn on totguard electric bike
- how to unlock lander s electric bike for beginners
- how to use a bike trainer to generate power
- how to use electric bike pump effectively
- how to maintain your jetson electric bike
- how to use jump electric bike for city commuting
- how to effectively use the electric citi bike system
- how to rent an uber electric bike
- finding the best compatible cups for townie electra bikes
- how to convert your bike to electric power
- how to rent a velib electric bike
- how to make an electric bike with an alternator
- how to download electric bike videos
- how to make an electric bike with drill tools
- how to make your bike electric
- how to charge your phantom electric bike
- finding the best locations for electric bike shops
- how to evaluate electric bike inventory
- how to upgrade your bike to electric with weer wavker
- how to program electric bike speedometer for accurate readings
- how to remove electra bike decals easily
- finding the right price for 2017 electra glide cop bikes
- how to gauge the effort required for an electric bike
- finding the best electric bike deals at costco
- finding the best deals on hans free electric bikes
- finding affordable second hand electric bike prices
- how to determine how much to lube electric bike
- how to build a stealth electric bike for city rides
- how to calculate calories burned on electric bikes
- steps to cancel vanmoof electric bike reservation
- essential tips for maintaining an electric bike
- how to deregulate an electric bike for better performance
- how to determine the tear of an electra townie bike
- how to drive an electric moto bike for beginners
- how to find indego electric bikes near you
- steps to fix a flat on your electric bike
- common electric bike issues and how to troubleshoot them
- how to reset your evo electric bike gps
- how to find electric bike repair shops near you
- how to diagnose issues with the thodle on my electric bike
- how to properly fold an archer electric bike
- how to properly fold a jetson electric bike
- step by step guide on how to fold up an emojo electric folding bike
- how to start an electric bike dealership
- how to flash your jetson bolt electric bike
- how to properly fold a jetson bolt electric bike
- how to get out of electric bike mode
- how to get replacement keys for swagtron eb 6 electric bike
- how to conceal a gps tracker in your electric bike
- how to increase speed on electric bike nanrobot n4
- how to choose the right rear rack for your electric bike
- how to charge electric bike on downhill safely
- how to choose the best electric bike from alibaba
- where to find target electric bikes
- how to locate electric capital bikeshare bikes
- how to get started with the jump electric bike program
- how to charge a mango electric bike efficiently
- how to reset calibration on your bionic electric bike
- how to reset your bionic electric bike for optimal performance
- how to unlock bionic electric bike controller for maximum performance
- how to find electric capital bikeshare bikes near you
- how to choose the best natko electric bikes
- how to easily fold and pick up an electric bike
- how to protect your electric bike from theft
- how to safely pull an electric bike behind an rv
- how to calculate how far electric bikes go
- finding electra bike dealers in west virginia
- can electric bike batteries be repaired
- understanding how to finance an electric bike
- how to buy an electric bike on monthly payments
- how to attach burley piccolo to electric bike
- how to properly store your electric bike
- finding citibike locations easily
- can electric scooters be repaired at bike shops
- how to prevent electric bike theft
How this page was built
This guide consolidates older pages on the same topic. It states what they state, reorganised for reading order; no specification, part number or price was introduced from outside those pages.
Maintenance steps are as described on the source pages; manufacturer instructions take precedence.
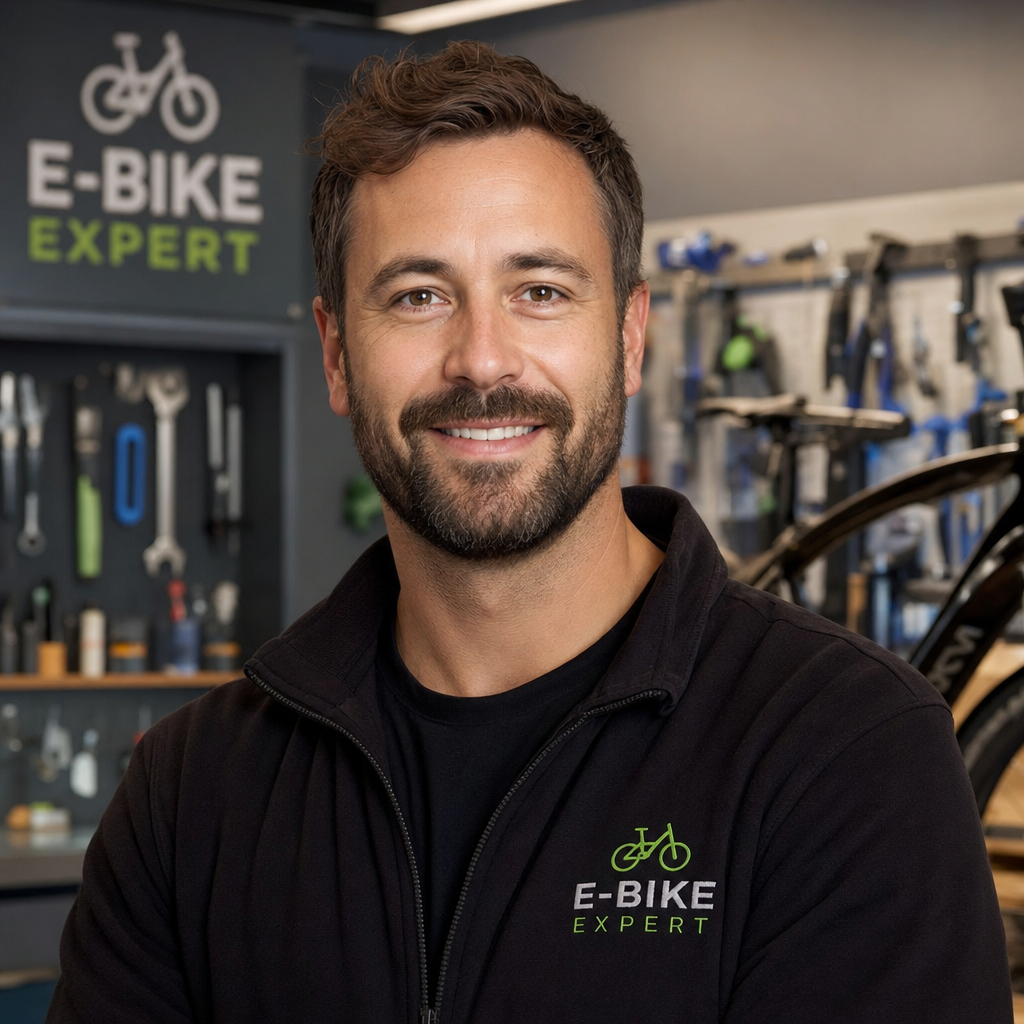
Ryan Williams has spent over 8 years testing, repairing, and writing about electric bikes. He has personally ridden and reviewed 150+ e-bike models from brands like Lectric, Aventon, Rad Power, Super73, and dozens more.
Before founding EBIKE Delight, Ryan worked as a bicycle mechanic for 5 years at independent bike shops across California, where he specialized in e-bike conversions and electrical system diagnostics. He holds a Certificate in Electric Vehicle Technology from the Light Electric Vehicle Association (LEVA).
Ryan’s work has been cited by Electric Bike Report, Electrek, and BikeRumor. When he is not testing the latest e-bike on California backroads, he is in his workshop tearing down batteries and controllers to understand what makes them tick — and what makes them fail.
Areas of Expertise
E-bike performance testing and real-world range verificationBattery diagnostics, charging best practices, and safetyBrand comparisons: Lectric, Aventon, Rad Power, Super73, and moreError code troubleshooting across major e-bike systemsE-bike laws, registration, and compliance by state
Ryan believes every rider deserves honest, hands-on information — not marketing hype.