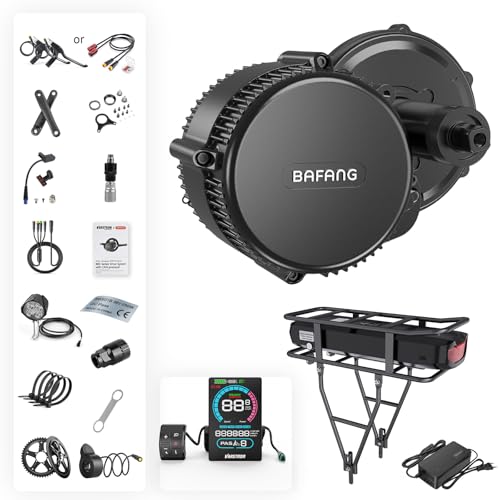
Bafang Motor Error Codes and Troubleshooting: Complete List
A Bafang error code on your display (BBS01, BBS02, or BBSHD) usually points to a wiring fault, a sensor issue, or a controller problem. The most common errors involve the throttle, brake levers, or speed sensor. Your first move is always to power-cycle the system and check all connectors for corrosion or loose pins. Below is the complete list of Bafang display error codes, what they mean, and the specific checks you can run at home.
How to Read the Error Code
Bafang’s standard displays (like the C961, C965, or DPC‑18) show a numeric error code on the screen, often replacing the speed or battery bar. Write down the number before you power off. Many codes are shared across Bafang motor families, but a few are specific to the BBSHD or newer Ultra drives. This list covers the codes you’ll encounter on 48V and 52V retrofit kits.
Error Code Quick Reference Table
| Code | Meaning | Most Likely Cause |
|---|---|---|
| 02 | Throttle fault | Throttle stuck, shorted, or disconnected |
| 03 | Brake lever fault | Brake sensor signal stuck (handlebar lever or hydraulic switch) |
| 04 | Speed sensor fault | PAS or wheel-speed sensor missing, dirty, or misaligned |
| 05 | Motor hall‑sensor fault | Internal hall sensor inside the motor damaged |
| 06 | Controller overheating | Controller temperature exceeded safe limit |
| 07 | Over‑voltage or under‑voltage | Battery voltage outside controller range |
| 08 | Controller internal fault | Short or component failure in the controller |
| 09 | Battery communication fault | BMS not talking to the display via the serial line |
| 10 | Motor phase‑wire fault | Short or break in phase wires (blue, yellow, green) |
Individual Error Code Breakdown with Fixes
Error 02 – Throttle Fault
The display reads 02 when the controller detects the throttle signal line is shorted to ground or stuck at a non‑zero position at startup.
What to do:
1. Unplug the throttle connector at the controller or handlebar. If the error code disappears immediately, the throttle assembly is faulty—replace it. If the error remains after unplugging, the problem is in the wiring or controller side, not the throttle itself.
2. Inspect the three throttle wires (red +5V, black ground, green signal) for frayed insulation or pinched sections near the stem.
3. Test the throttle with a multimeter: with the throttle unplugged, measure resistance between signal and ground. A reading below 100 ohms indicates a short.
4. Replace the throttle assembly if no wiring damage is visible.
Error 03 – Brake Lever Fault
Code 03 appears when one brake lever’s e‑brake sensor (normally open or normally closed) sends a continuous brake signal, preventing the motor from running.
What to check:
- Disconnect the left and right brake lever plugs one at a time. If the error disappears when you unplug one side, that lever’s sensor is stuck—replace the lever or its sensor. If the error stays after both are unplugged, the controller’s brake input circuit may be shorted.
- On hydraulic brakes with magnetic reed switches, the magnet inside the lever may have shifted. Realign the magnet so it sits directly over the sensor when released.
- For mechanical brake levers with a switch, look for a broken spring that keeps the plunger depressed.
Error 04 – Speed Sensor Fault
The speed sensor (often called the PAS sensor or wheel speed sensor) is a small magnet ring or a pickup on the motor axle. Code 04 means the controller sees no signal from the sensor within a few wheel rotations.
Troubleshooting steps:
1. Check the sensor gap: the magnet ring and the sensor pickup should be 1–2 mm apart. A gap wider than 5 mm will fail to trigger.
2. Clean any metal debris or grease from the sensor face. Ferrous filings can bridge the magnetic field.
3. If you have a spoke‑magnet sensor, verify the magnet passes the pickup squarely. Bent spokes can move the magnet out of range.
4. Rotate the wheel slowly by hand while watching the display speed readout. If the display shows zero speed, the sensor or wiring is dead. If the display shows speed (e.g., 3–5 mph) but the error code remains, try disconnecting the battery for 90 seconds to reset the controller—sometimes a stale fault latch needs clearing.
5. If the sensor gap and cleaning don’t work, replace the sensor unit (about $10–15). If the code returns after replacement, the controller’s speed‑sensor input circuit may be damaged.
Error 05 – Motor Hall‑Sensor Fault
This is one of the few errors that requires motor disassembly. Hall sensors inside the motor detect rotor position. Code 05 usually means one of the three hall sensors (U, V, W) failed.
Home checks (before removing the motor):
- Unplug the motor hall connector from the controller. Use a multimeter to check for 5V between the red and black pins. If 5V is absent, the controller’s 5V rail is dead—replace the controller.
- If 5V is present, spin the motor axle slowly while measuring voltage on the three signal wires – they should alternate between 0V and 5V. A constant 0V or 5V on any wire points to a blown hall sensor.
Fix: Replace the damaged hall sensor. This requires opening the motor side cover and desoldering the old sensor. If you aren’t comfortable with soldering inside a motor, take it to an e‑bike shop. If you open the motor and find burnt windings or melted insulation, stop—the motor itself may be beyond repair and should be replaced.
Error 06 – Controller Overheating
The controller (mounted on the motor or in the frame) has an internal temperature sensor. Code 06 triggers when that sensor reads above roughly 140 °F (60 °C).
What you can do:
- Stop riding and let the motor cool for 15–20 minutes. If the code clears and stays off during easier riding, the fault was simply thermal.
- Check that the controller isn’t wrapped in insulating material or tucked inside a sealed battery bag. Add a small heatsink or relocate the controller to an area with airflow.
- If the error returns quickly even on level ground with moderate assist, the controller’s thermal sensor may be failing. Replacement is the only cure.
Error 07 – Over‑Voltage / Under‑Voltage
The controller expects a specific battery voltage range. Code 07 means the battery voltage is either too high (above the controller’s max) or too low (below the low‑voltage cutoff).
Check these:
- Measure battery voltage at the discharge port with a multimeter. A fully charged 48V battery should read ~54.6V. If you read 60V+, the charger may be mis‑matched (e.g., a 52V charger on a 48V battery).
- If voltage is below ~30V (for 48V systems), the battery is deeply discharged. Charge it immediately, but do not ride until it’s fully charged.
- Inspect the battery connector for melted pins or poor contact that drops voltage under load. If the pins look charred or the plastic is deformed, replace the connector pair—riding with a loose or arcing connector can damage both the battery and controller.
Error 08 – Controller Internal Fault
Code 08 is a generic controller failure. It can mean a short between the battery positive and negative inside the controller, a blown MOSFET, or a damaged capacitor.
What you can do at home:
- Disconnect the battery and all motor/display plugs. Wait 30 seconds, reconnect only the battery and display, then turn on. If the error is gone, a peripheral (like a lighting harness) caused the fault.
- If code 08 persists with only battery and display connected, the controller is likely dead. Replace the controller unit – it is usually the silver box bolted to the motor. Do not ride with this error—a shorted controller can drain your battery rapidly or cause a fire.
Error 09 – Battery Communication Fault
Bafang controllers use a serial data line (Tx/Rx) to talk to the battery BMS. Code 09 indicates the controller isn’t receiving battery data.
Quick checks:
- Ensure the battery locking plug is fully seated.
Related Articles
- Yamaha E-Bike Motor Error Codes: Complete Display Warning & Troubleshooting
- Shimano E-Bike Motor Error Codes: Complete Display Warning & Troubleshootin
- Brose E-Bike Motor Error Codes: Complete Display Warning & Troubleshooting

Ryan Williams has spent over 8 years testing, repairing, and writing about electric bikes. He has personally ridden and reviewed 150+ e-bike models from brands like Lectric, Aventon, Rad Power, Super73, and dozens more.
Before founding EBIKE Delight, Ryan worked as a bicycle mechanic for 5 years at independent bike shops across California, where he specialized in e-bike conversions and electrical system diagnostics. He holds a Certificate in Electric Vehicle Technology from the Light Electric Vehicle Association (LEVA).
Ryan’s work has been cited by Electric Bike Report, Electrek, and BikeRumor. When he is not testing the latest e-bike on California backroads, he is in his workshop tearing down batteries and controllers to understand what makes them tick — and what makes them fail.
Areas of Expertise
E-bike performance testing and real-world range verificationBattery diagnostics, charging best practices, and safetyBrand comparisons: Lectric, Aventon, Rad Power, Super73, and moreError code troubleshooting across major e-bike systemsE-bike laws, registration, and compliance by state
Ryan believes every rider deserves honest, hands-on information — not marketing hype.