How to Change Ninja Electric Bike Light Bulb
how to change ninja electric bike light bulb: Quick Answer
- Most Ninja electric bike headlights are designed for straightforward bulb replacement, often requiring basic tools like a Phillips screwdriver.
- The process typically involves accessing the headlight housing, removing the old bulb, and installing the new one.
- Always ensure you have the correct replacement bulb type and voltage for your specific Ninja electric bike model.
Who This Is For
- Ninja electric bike owners experiencing a burnt-out headlight.
- Individuals comfortable with basic bicycle maintenance and tool use.
What to Check First
- Bike Model and Year: Confirm the exact model and year of your Ninja electric bike to ensure you purchase the correct replacement bulb.
- Bulb Type and Voltage: Refer to your bike’s owner’s manual or the existing bulb for specifications (e.g., LED, halogen, voltage rating).
- Tools Required: Gather necessary tools, which may include screwdrivers (Phillips, flathead), pliers, and potentially a small wrench.
- Replacement Bulb: Purchase a compatible bulb. Using an incorrect bulb can damage the electrical system.
Step-by-Step Plan: How to Change Ninja Electric Bike Light Bulb
This guide outlines the general process for how to change a Ninja electric bike light bulb. Always consult your specific model’s manual for exact instructions.
1. Power Down and Secure:
- Action: Turn off your electric bike and remove the battery if easily accessible and recommended by the manual.
- Look for: A completely powered-off system to prevent electrical shorts or shocks.
- Mistake: Attempting to change the bulb while the bike is powered on.
If you are comparing options here, XinGeeek Electrical Motorbike Tail Light,12V Electric Scooter Brake Light and Turn Signal for Ebike Accessories Night Riding Brake Lamp is a relevant choice worth checking.
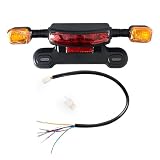
- This is a 3-in-1 e-bike light with tail light, turn signal and brake light,can work with 12V battery.
- The electric bike tail light is made of high quality material, durable and can be used for a long time.
- Electric motorbike tail light with super bright LED bulb for maximum visibility, increase the safety of night riding.
- This electric bike tail light is easy to install and remove without any tools.It can be easily mounted on bikes,scooters,e-bikes and more.
- Electric motorbike is universal,perfect for electric motorbikes, bicycles,scooters,e-bikes and more.
2. Access the Headlight Housing:
- Action: Locate the screws or clips securing the headlight assembly or its cover.
- Look for: Small screws, often Phillips head, or plastic clips that need to be gently pried open.
- Mistake: Forcing the housing open, which can break plastic parts.
3. Remove the Old Bulb:
- Action: Once the housing is open, carefully disconnect the bulb’s connector and gently twist or pull the bulb out of its socket.
- Look for: A distinct socket connection and a bulb that may be seated with a bayonet mount or simply pushed in.
- Mistake: Yanking the bulb forcefully, potentially damaging the socket or wiring.
4. Install the New Bulb:
- Action: Insert the new, compatible bulb into the socket, ensuring it’s seated correctly. Reconnect the electrical connector firmly.
- Look for: The bulb aligning with the socket’s guides and the connector clicking into place.
- Mistake: Not fully seating the bulb or connecting the wiring, leading to a non-functional light.
5. Reassemble the Headlight Housing:
- Action: Carefully place the headlight cover or assembly back into position and secure it with the screws or clips removed earlier.
- Look for: A snug fit and all screws/clips properly aligned and tightened.
- Mistake: Leaving the housing loose, allowing moisture or debris to enter.
6. Test the New Bulb:
- Action: Reinstall the battery (if removed), power on the bike, and test the headlight functionality.
- Look for: The new bulb illuminating brightly and consistently.
- Mistake: Assuming the bulb works without testing, only to discover it doesn’t when needed.
Expert Tips for Changing Your Ninja Electric Bike Light Bulb
- Tip 1: Before you begin, identify the bulb type. For example, if your manual specifies a H4 bulb, ensure your replacement is also H4.
- Action: Check the old bulb for any markings or consult your owner’s manual for the exact bulb specification (e.g., wattage, voltage, base type).
- Mistake to Avoid: Purchasing a bulb that looks similar but has a different base or wattage, which could lead to poor performance or damage.
- Tip 2: Handle LED bulbs with care. Many modern Ninja electric bikes use LED lights, which are often integrated units and not user-replaceable bulbs.
- Action: If you have an LED light and it fails, confirm if it’s a sealed unit. If so, you may need to contact the manufacturer for a replacement assembly.
- Mistake to Avoid: Trying to pry apart a sealed LED unit, which is not designed for individual component replacement and can be costly to repair.
- Tip 3: Use the right tools for the job. Using a screwdriver that’s too large or small can strip screw heads.
- Action: Select a screwdriver that fits snugly into the screw head. If dealing with plastic clips, use a plastic trim tool or a flathead screwdriver very gently.
- Mistake to Avoid: Using excessive force or the wrong tool, which can damage screws, plastic housings, or the bike’s finish.
Common Mistakes
- Wrong Bulb Type — Using a bulb with incorrect voltage or wattage can overload the bike’s electrical system, leading to blown fuses, damaged wiring, or premature failure of the new bulb. Always verify specifications.
- Forcing Components — Applying too much pressure when opening the housing or removing the bulb can crack plastic parts or bend metal connectors. Work gently and use the correct tools.
- Not Disconnecting Power — Working on the electrical system without disconnecting power poses a risk of short circuits, damaging components, or personal injury. Always ensure the bike is off and the battery is disconnected if possible.
- Improper Seating — A bulb not fully seated in its socket or a connector not firmly attached will result in a non-functional light. Ensure both the bulb and its connector are secure.
FAQ
- Q: How do I know if my Ninja electric bike headlight bulb needs replacing?
- A: The most obvious sign is a headlight that doesn’t turn on or is significantly dimmer than usual. Flickering can also indicate a failing bulb.
- Q: Can I upgrade my Ninja electric bike headlight bulb to a brighter one?
- A: While possible, it’s crucial to ensure the new bulb’s wattage and voltage are compatible with your bike’s electrical system. An incompatible upgrade can cause damage. Consult your manual or a professional.
- Q: My Ninja electric bike has an LED headlight. Can I change the bulb myself?
- A: Many LED headlights are integrated units and not designed for individual bulb replacement. If your LED headlight fails, you may need to replace the entire assembly. Check your manual for specifics.
- Q: How often should I expect to replace my Ninja electric bike headlight bulb?
- A: Incandescent bulbs have a limited lifespan and may need replacement every few years depending on usage. LED lights are designed to last much longer, often for the lifetime of the bike.
If you are comparing options here, Nagevsem Bike Lights Set, LED Super Bright USB-C Rechargeable Headlight & Taillight, Waterproof Front & Rear Back Bicycle Light for Night Riding, Road & Mountain Cycling (2-Pack Bike Lights Set) is a relevant choice worth checking.

- ULTRA BRIGHT: Bicycle lights set for night riding and cycling. Powerful headlight with dual LED and wide beam range 500 ft, plus rear light with 150° beam, provides excellent visibility and safety
- DIGITAL DISPLAY & FAST CHARGING: USB‑C cable fully charges the front bike Light in 3 hrs and the rear light in 2 hrs. Built‑in Digital Display shows remaining battery life for hassle-free cycling
- 6+4 LIGHT MODES: Flashlight bike set offers superior visibility with 6 front Light modes & 4 tail Light modes. Easily select the ideal mode with one button and adjust the 360° Rotating headlight for perfect illumination every ride
- IPX4 WATERPROOF: Durable Aluminum housing protects rechargeable bike lights front & back from water and dust, ensuring reliable performance in any weather for long‑lasting use
- EASY INSTALL: Rechargeable bicycle lights front and rear mount in seconds with secure adjustable straps. Fits any bike effortlessly & keeps you safe on every ride — this is your ideal bike light kit
- Q: What if the new bulb doesn’t work after installation?
- A: Double-check that the bulb is correctly seated in the socket and the electrical connector is firmly attached. Also, ensure the power is on and the battery is charged. If it still doesn’t work, the issue might be with the wiring or the headlight assembly itself.
Replacement Bulb Checklist
- [ ] Correct bulb type (e.g., H4, LED) verified.
- [ ] Correct voltage rating matches bike’s system.
- [ ] Bulb base matches the socket.
- [ ] No visible damage to the new bulb.
- [ ] Necessary tools (screwdrivers, etc.) are ready.
CODEBLOCK_0
Ryan Williams has spent over 8 years testing, repairing, and writing about electric bikes. He has personally ridden and reviewed 150+ e-bike models from brands like Lectric, Aventon, Rad Power, Super73, and dozens more.
Before founding EBIKE Delight, Ryan worked as a bicycle mechanic for 5 years at independent bike shops across California, where he specialized in e-bike conversions and electrical system diagnostics. He holds a Certificate in Electric Vehicle Technology from the Light Electric Vehicle Association (LEVA).
Ryan’s work has been cited by Electric Bike Report, Electrek, and BikeRumor. When he is not testing the latest e-bike on California backroads, he is in his workshop tearing down batteries and controllers to understand what makes them tick — and what makes them fail.
Areas of Expertise
E-bike performance testing and real-world range verificationBattery diagnostics, charging best practices, and safetyBrand comparisons: Lectric, Aventon, Rad Power, Super73, and moreError code troubleshooting across major e-bike systemsE-bike laws, registration, and compliance by state
Ryan believes every rider deserves honest, hands-on information — not marketing hype.
Last update on 2026-06-23 / Affiliate links / Images from Amazon Product Advertising API