Troubleshooting Your Bike: A Guide to Common Issues
Every rider eventually faces the same moment: you’re ready to roll, and something’s off. A grinding brake, a motor that cuts out, a chain that won’t stay put. Most bike problems—including e-bike issues—share the same root causes and follow the same logical repair path. This guide walks through the most common failures, what causes them, and exactly how to fix them, with an emphasis on the electrical connections that make e-bikes uniquely finicky.
Start With a 60-Second Diagnostic Ride
Before you touch a single tool, spend one minute diagnosing by sensation. Ride the bike slowly in a straight line, then brake gently, then coast. Ask yourself three questions:
1. Is the noise constant or only under load? Constant rubbing usually means brake pad contact or a bent rotor. Noise only when pedaling hard points to drivetrain wear.
2. Does the bike pull to one side? That’s a brake or wheel alignment issue, not a motor issue.
3. Does the motor hesitate, surge, or cut out entirely? That points to electrical connections, battery health, or controller faults—not mechanical wear.
This quick triage prevents you from disassembling the wrong component. A surprising number of “motor problems” turn out to be a loose brake sensor or a partially seated battery connector.
Brake Problems: Squealing, Grinding, and Weak Stopping Power
Brakes are the most common source of rider complaints, and they’re also the easiest to fix correctly. The cause depends on whether you’re hearing noise, feeling a spongy lever, or losing stopping power entirely.
Disc Brakes: Squeal and Rub
A high-pitched squeal when braking means the pad is vibrating against the rotor, usually due to contamination or misalignment. Oil from chain lube, finger grease, or road grime on the pad surface is the usual culprit. Remove the wheel, pull the pads, and inspect them. If they look shiny or dark, they’re contaminated. You can try sanding the surface lightly with fine grit paper, but replacement is more reliable—brake pads are inexpensive.
Rotor rub—a rhythmic tick or scrape with every wheel rotation—means the rotor is bent or the caliper isn’t centered. Loosen the two caliper mounting bolts, squeeze the brake lever firmly, and retighten while holding the lever. This centers the caliper over the rotor. If the rub persists, the rotor itself is warped. A rotor truing tool can bend it back, but if it’s been overheated, replace it.
Hydraulic vs. Mechanical: Spongy Lever
A spongy brake lever on a hydraulic system means air in the line. You’ll need a bleed kit specific to your brake brand (Shimano, SRAM, Tektron, etc.). This is a messy job—lay down shop towels and have isopropyl alcohol on hand for cleanup. A ForPro Professional Collection 99% Isopropyl Alcohol works well for cleaning brake rotors and pads before reassembly, since it evaporates without leaving residue.
On mechanical brakes, a spongy lever usually means cable stretch or a frayed cable. Tighten the barrel adjuster at the lever first—that often solves it. If the lever still pulls to the bar, inspect the cable for rust or broken strands, especially near the pinch bolt.
E-Bike Specific: Brake Cutoff Sensors
E-bikes have brake levers with integrated sensors that cut motor power when you squeeze. If your motor keeps running while braking, or if the motor won’t engage at all, the sensor is likely misaligned or the wiring is damaged. Check where the sensor wire enters the lever housing—this is a common pinch point. A loose connector here mimics a dead motor, so before replacing anything, unplug and reseat every brake sensor connector.
Drivetrain Issues: Chain Slipping, Skipping, and Noisy Shifting
A chain that skips under load or a derailleur that won’t shift cleanly usually comes down to wear, not adjustment. Chains stretch with use, and a stretched chain wears the cassette and chainrings faster. If you replace a chain on a badly worn cassette, the new chain will skip on the old teeth.
Check Chain Wear First
Use a chain wear indicator tool. If it drops into the chain at the 0.75% mark, replace the chain. At 1.0%, plan to replace the cassette too. Riding a worn chain is the fastest way to turn a $25 fix into a $150 drivetrain replacement.
Indexing: When Shifting Feels “Off”
If the chain hesitates or clunks between gears, the cable tension is off. Shift to the smallest rear cog, then turn the barrel adjuster at the rear derailleur counterclockwise in quarter-turn increments while pedaling. Each click should move the chain cleanly to the next cog. If you run out of adjustment, check the derailleur hanger for bending—a slightly bent hanger makes indexing impossible to fix with cable tension alone.
E-Bike Drivetrain Wear Is Faster
E-bike motors deliver more torque to the drivetrain than your legs can. Chains, cassettes, and chainrings on e-bikes wear roughly twice as fast as on acoustic bikes. If you ride a hub-motor e-bike, the drivetrain is under less stress, but mid-drive motors (where the motor drives the crank) put full motor torque through the chain. Budget for chain replacement every 1,000–1,500 miles on a mid-drive, versus 2,000–3,000 on a hub motor.
Electrical System: Motor Cutouts, Dead Displays, and Range Loss
This is the category that separates e-bike troubleshooting from standard bike repair. Most electrical issues are connection problems, not component failures. Before you suspect the motor or controller, check every connector.
The Connector Check: Your First Move
E-bike wiring harnesses use waterproof connectors between the battery, controller, display, motor, and sensors. Vibration loosens these over time, and corrosion builds up on the pins. Follow this sequence:
1. Power off and remove the battery.
2. Unplug and reseat every connector you can reach—display, throttle, PAS sensor, brake sensors, motor cable.
3. Inspect the pins. Look for bent, pushed-back, or discolored pins. A single pushed-back pin causes intermittent cutouts that are maddening to diagnose.
4. Clean corroded pins with electrical contact cleaner and a soft brush.
If you find damaged pins or want to replace worn connectors, a 812Pcs Pin Connector Kit with Crimping Pliers gives you the terminal pins, waterproof seals, and extraction tools to rebuild a connector properly. This kit is particularly useful if you own multiple e-bikes or plan long-term ownership—connector repair is inevitable.
Motor Cuts Out Under Load
If the motor dies when you hit a hill or accelerate hard, the problem is almost always one of three things:
| Symptom | Likely Cause | Fix |
|---|---|---|
| Cutout on hard acceleration, recovers after restart | Loose battery connector or high-resistance connection | Reseat battery, check connector pins for heat damage |
| Cutout on bumps or rough roads | Intermittent connection in motor cable or PAS sensor | Unplug/reseat all connectors; zip-tie cables to prevent movement |
| Cutout with error code on display | Controller fault or hall sensor failure | Check error code chart for your model; test hall sensor wires |
Battery Range Dropped Suddenly
A sudden range drop—not gradual—usually points to a battery cell imbalance or a failing charger. If your battery charges to full but drains quickly under load, the battery management system (BMS) is likely balancing cells poorly. Let the battery charge fully, then leave it on the charger for an extra hour to allow balancing. If range doesn’t improve after two full charge cycles, the battery may need professional testing.
Cold weather also reduces range. Lithium batteries lose roughly 20% of capacity at 32°F and up to 40% at freezing. This is physical chemistry, not a fault. Store the battery indoors during winter and warm it before riding.
Display Won’t Power On
If the display is dead, check the battery first—not the display. Confirm the battery has charge, then check the battery-to-controller connection. Many e-bikes have a keyed battery that must be fully seated; a half-latched battery powers the display briefly, then cuts out on the first bump. If the display still won’t power, unplug the display connector and check for bent pins. Displays are rarely the failure point—connections are.
Tires and Wheels: Punctures, Wobbles, and Spoke Tension
Flat tires are the most common roadside issue, but wheel wobble and spoke problems cause more long-term damage if ignored.
Fixing a Flat: The Proper Way
Remove the wheel, deflate the tire fully, and use tire levers to work one bead off the rim. Pull the tube out, then run your finger around the inside of the tire to find the puncture cause—a nail, glass shard, or wire that’s still embedded. Replace the tube or patch it, but only patch tubes with small holes; sidewall damage means replacement.
Before reinstalling, check the rim tape. If it’s shifted, the tube will rub against spoke holes and puncture again. This is the most common cause of repeated flats.
Wheel Wobble
Spin the wheel and watch the rim. If it wobbles side to side, spokes are unevenly tensioned. Squeeze pairs of spokes—loose spokes feel slack. Tighten loose spokes in quarter-turn increments, alternating sides. If the wobble is severe or you hear creaking, take the wheel to a shop for truing; a collapsed wheel at speed is dangerous.
E-Bike Tire Pressure Matters More
E-bikes are heavier than standard bikes, especially hub-motor models where the motor adds 10+ pounds to the rear wheel. Under-inflated tires on an e-bike cause pinch flats (snake bites) and excessive sidewall flex. Check your tire sidewall for the recommended pressure range and inflate to the upper half of that range for e-bike use. A rear hub motor also puts more stress on spokes—check rear spoke tension monthly if you ride daily.
Chain and Lubrication: The Cheap Fix That Prevents Most Problems
A dry, dirty chain causes more shifting and drivetrain issues than any other single factor. Clean the chain with a degreaser, dry it, then apply a wet or dry lube depending on your climate. Wipe off excess lube—a wet chain attracts grit and accelerates wear.
For e-bikes, chain maintenance is critical because motor torque amplifies any drivetrain friction. A dry chain on a mid-drive motor wears chainrings and cassettes quickly, turning a routine maintenance task into a costly repair.
When to Call a Professional
Some repairs require specialized tools or safety knowledge. Seek professional help if:
- The battery case is cracked or swollen. Do not charge or ride it. Lithium battery damage is a fire risk.
- The motor makes grinding or clicking noises from inside the hub or mid-drive unit. Internal motor repair requires specialized tools and knowledge.
- Hydraulic brake lines need bleeding and you don’t have the correct bleed kit. Improper bleeding leaves air in the line and reduces braking power.
- The frame has cracks or dents. This is a safety-critical structural issue.
A concrete stop threshold: If you’ve reseated every connector, cleaned all pins, and the motor still cuts out under load with an error code on the display, stop. That combination points to a controller or motor hall sensor failure, not a connection issue. Continuing to ride risks damaging the controller or motor windings. Contact your bike manufacturer’s support or a certified e-bike shop at this point—further DIY diagnosis requires a multimeter and manufacturer-specific error code charts.
Verification step: After any repair, confirm the fix with a short test ride. For electrical issues, ride the bike over a bumpy stretch and accelerate hard up a hill. The motor should deliver power smoothly without hesitation, and the display should stay lit throughout. For brake work, squeeze the lever firmly at a standstill—the lever should feel firm, not spongy, and the wheel should stop cleanly when spun by hand. For drivetrain fixes, shift through every gear under light pedaling; each shift should click into place without clunking or skipping.
FAQ
How often should I replace my bike chain?
Check chain wear every 500 miles with a wear indicator. Replace at 0.75% stretch for standard bikes, or earlier for mid-drive e-bikes. A worn chain accelerates cassette and chainring wear, so replacing it promptly saves money long-term.
Why does my e-bike motor cut out when I hit bumps?
A loose connector in the motor cable, PAS sensor, or display harness is the most likely cause. Power off, remove the battery, and reseat every connector you can reach. Secure cables with zip ties to prevent movement.
Can I ride with a slightly bent rotor?
You can, but the brake will rub and stopping power will be reduced. Minor bends can be trued with a rotor tool. If the rotor is heavily warped or overheated, replace it—braking performance is not worth compromising.
Why is my e-bike range shorter in winter?
Cold temperatures reduce lithium battery capacity by 20–40%. This is normal chemistry, not a fault. Store the battery indoors and warm it before riding to recover some range.
How do I know if my brake pads need replacing?
Look through the caliper at the pad material. If the pad is thinner than 1mm, or if you hear metal-on-metal grinding, replace them immediately. Squealing without grinding usually means contamination, not wear.
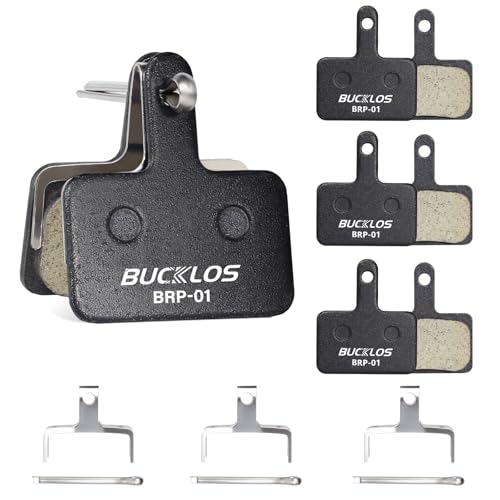 BUCKLOS Bike Disc Brake Pads for TRP Tektro Shimano MT200 M575 DeoreCheck price on AmazonWe may earn a commission
What’s the most common cause of e-bike display failure?
A loose or corroded connector, not the display itself. Always unplug and reseat the display connector, check for bent pins, and clean with contact cleaner before replacing any display component.
Start with the simplest fix—reseating connectors, cleaning the chain, centering brakes—and work outward from there. Most bike problems, including e-bike electrical gremlins, trace back to loose connections, worn consumables, or contamination. A systematic approach saves you money and gets you back on the road faster than replacing parts blindly. Keep your drivetrain clean, your connectors seated, and your brakes centered, and your bike will reward you with reliable miles.

Ryan Williams has spent over 8 years testing, repairing, and writing about electric bikes. He has personally ridden and reviewed 150+ e-bike models from brands like Lectric, Aventon, Rad Power, Super73, and dozens more.
Before founding EBIKE Delight, Ryan worked as a bicycle mechanic for 5 years at independent bike shops across California, where he specialized in e-bike conversions and electrical system diagnostics. He holds a Certificate in Electric Vehicle Technology from the Light Electric Vehicle Association (LEVA).
Ryan’s work has been cited by Electric Bike Report, Electrek, and BikeRumor. When he is not testing the latest e-bike on California backroads, he is in his workshop tearing down batteries and controllers to understand what makes them tick — and what makes them fail.
Areas of Expertise
E-bike performance testing and real-world range verificationBattery diagnostics, charging best practices, and safetyBrand comparisons: Lectric, Aventon, Rad Power, Super73, and moreError code troubleshooting across major e-bike systemsE-bike laws, registration, and compliance by state
Ryan believes every rider deserves honest, hands-on information — not marketing hype.