Unlocking Your Bionic Electric Bike Controller: A Step-by-Step Guide
If your Bionic e-bike feels capped well below its potential—topping out early, ignoring throttle input, or hesitating at every pedal-assist level—the controller is almost certainly the reason. Most Bionic controllers ship with factory parameters that limit top speed and throttle authority to meet consumer-class e-bike regulations. The good news: you can unlock those settings yourself with a programming cable and about 20 minutes of careful work. This guide walks you through the entire process, from identifying your controller to saving a custom tune that matches how you actually ride.
Know Your Controller Before You Change Anything
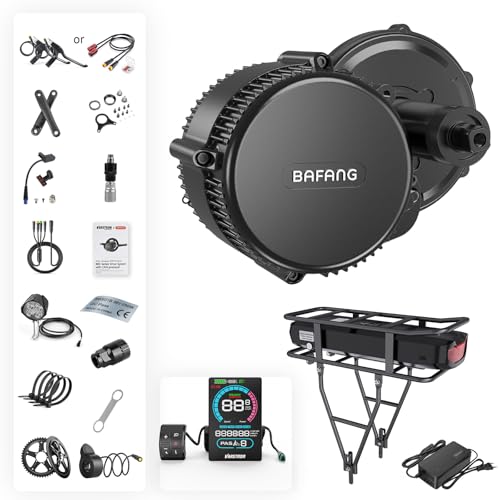
Bionic e-bikes use different controllers depending on the model year and motor kit. The two most common setups are BAFANG mid-drive systems (BBS01B, BBS02B, BBSHD) and generic brushless hub motors. The unlocking procedure differs between them, so check the motor housing or controller casing for a model sticker before you buy any cables or download any software.
What you’re actually changing: The controller’s firmware parameters govern how much current the motor draws, how the throttle responds at each pedal-assist level, and the maximum speed before the motor cuts out. Unlocking typically means raising the speed limit from 20 mph (class 2) to 28 mph or higher, and enabling full throttle authority across all PAS levels. On a 750W motor with a 48V battery, that software cap is often the only thing holding the bike back from its real physical ceiling.
A legal note: Raising the speed limit may reclassify your bike under local laws. If you ride on public roads, check whether your state or municipality requires e-bikes to stay under 20 mph (class 2) or 28 mph (class 3). This is your responsibility, not the manufacturer’s—and it’s worth knowing before you invest time in the unlock process.
What You Need to Unlock the Controller
The hardware requirements are minimal, but you need the right cable for your motor generation. Here’s the full shopping list:
| Component | Purpose | Notes |
|---|---|---|
| Programming cable | Connects controller to a PC | Must match your motor brand and firmware version |
| Laptop or desktop | Runs the configuration software | Windows is standard; some cables work with Android via OTG |
| Configuration software | Displays and edits controller parameters | Usually free from the motor manufacturer |
| Charged battery | Keeps the controller powered during flashing | Do not attempt with a low battery |
For BAFANG mid-drive systems, the E-Mangue Ebike Programming Cable for BAFANG UART Version BBS01B BBS02B BBSHD is the standard tool. It connects to the motor’s COM port and gives you access to the full parameter set, including throttle override and per-level speed limits. Confirm your motor is a UART version—not CAN bus—before ordering, as the two use different protocols and are not interchangeable. If you have a hub motor, check the controller casing for a brand name and search for that manufacturer’s programming cable instead.
Step 1: Connect the Programming Cable to the Motor
Locate the COM port on your motor. On BAFANG mid-drives, it’s a round, multi-pin socket on the left side of the motor housing, often covered by a rubber cap. On hub-motor bikes, the port is usually on the controller box itself, which may be mounted inside the frame or under the rear rack.
1. Turn off the battery and disconnect it from the frame for safety.
2. Plug the programming cable into the motor’s COM port.
3. Connect the USB end of the cable to your laptop.
4. Reconnect the battery and turn on the display. The motor should power up, and your PC should recognize the cable as a serial device.
If the PC doesn’t detect the cable, you may need to install a USB-to-serial driver. Check the cable manufacturer’s page for the driver link—most use a common CH340 or CP210x chip. This is the most common stumbling block, and it’s almost always a driver issue rather than a hardware failure.
Step 2: Install and Launch the Configuration Software
Download the appropriate configuration tool for your motor. For BAFANG systems, the software is typically called “Bafang Configuration Program” and is available from the motor manufacturer’s support page. For generic hub controllers, the software name varies—check your controller’s manual or the manufacturer’s website.
Once installed:
1. Open the software.
2. Select the correct COM port from the dropdown menu (usually COM3, COM4, or higher—check Device Manager if unsure).
3. Click “Read” or “Connect” to pull the current parameters from the controller.
The software will display a table of values. Do not change anything yet. Save a screenshot or write down the original values so you can restore them if needed. This step is what makes the whole process reversible—skipping it turns a 20-minute job into a potential headache.
Step 3: Adjust the Speed Limit and Throttle Parameters
The exact parameter names vary by firmware version, but the core settings are consistent across BAFANG and most generic controllers:
| Parameter | Typical Factory Value | Unlocked Value | What It Does |
|---|---|---|---|
| Speed Limit (km/h) | 25–32 | 40–45 | Maximum motor speed before cutoff |
| Throttle Handle Start Voltage | 1.0–1.2V | 0.8V | Lower value = throttle responds sooner |
| Throttle Handle End Voltage | 3.6–4.2V | 4.2V | Upper range for full throttle |
| PAS Level Speed Limits | 20–25 km/h per level | 40–45 km/h | Per-assist-level speed caps |
| Current Limit (A) | 15–25A | Match motor rating | Maximum current draw; do not exceed motor spec |
Key adjustments for most riders:
- Raise the global speed limit to 40–45 km/h (25–28 mph). This is the single most effective change for unlocking top speed. On a 48V system, this removes the software ceiling that typically cuts power around 20 mph.
- Enable throttle override if available. This lets the throttle work independently of pedal-assist, so you can engage the motor without pedaling—useful for starting from a dead stop on an incline or navigating technical terrain.
- Set PAS levels to a uniform speed cap if you want consistent power across all assist levels. Many riders prefer level 1 at 20 km/h, level 2 at 30 km/h, and levels 3–5 at the max. This gives you finer control at low speeds while keeping full power available when you need it.
A caution on current limits: Do not raise the current limit above the motor’s continuous rating. A BBS01B rated at 250W should stay near 15–18A; a BBSHD rated at 1000W can handle 25–30A. Exceeding these values risks overheating the motor windings and shortening the controller’s lifespan. If you don’t know the motor’s rating, leave the current limit alone—the speed limit change alone will give you most of the benefit without the thermal risk.
Step 4: Write the New Parameters and Test
Once you’ve entered the new values:
1. Click “Write” or “Save” to flash the parameters to the controller.
2. Wait for the confirmation message—do not disconnect the cable during this process. Interrupting a write can corrupt the controller firmware.
3. Turn off the battery, disconnect the programming cable, and reassemble any covers.
4. Take the bike for a short test ride in a safe, open area.
What to check on the test ride:
- Throttle response from a standstill—should engage smoothly without jerking.
- Top speed on a flat, straight stretch—compare against your target. A 750W motor on a 48V battery typically reaches 28–30 mph on flat ground once the cap is removed.
- Motor temperature after 10 minutes of riding—if the casing is too hot to touch, reduce the current limit.
- Display readout—some displays show the speed limit; confirm it matches your new setting.
If something feels wrong, reconnect the cable and restore your saved original values. The process is fully reversible, and there’s no shame in dialing back if the bike feels too aggressive for your riding style.
Common Error Codes and How to Fix Them
After unlocking, you may encounter error codes on the display. Here’s what the most common ones mean:
| Error Code | Meaning | Likely Fix |
|---|---|---|
| 21 / 22 | Speed sensor malfunction | Check the magnet alignment on the wheel spoke; ensure the sensor gap is 3–5mm |
| 25 | Motor phase error | Recheck the motor cable connections; a loose phase wire causes this |
| 30 | Communication error | Verify the display cable is seated properly; reboot the system |
| 35 | Controller overcurrent | Your current limit is too high; reduce it by 5A and retest |
These codes are diagnostic aids, not permanent failures. Most are caused by loose connections or overly aggressive settings—both are easy to correct. If you see error 35, for example, the fix is straightforward: drop the current limit by 5A, rewrite the parameters, and test again. The bike isn’t broken; it’s telling you exactly what needs adjusting.
FAQ
Will unlocking my controller void the warranty?
Most manufacturers consider parameter changes a modification and may deny warranty claims related to the motor or controller. Cosmetic issues and mechanical parts like brakes or tires are typically unaffected. Check your warranty terms before proceeding.
Can I unlock the controller without a laptop?
Some newer BAFANG displays allow limited parameter changes through the settings menu, but full unlocking—including throttle override and per-level speed caps—requires the programming cable and software. There is no reliable phone-only method for most systems.
How fast will my bike go after unlocking?
That depends on your motor’s power and your battery’s voltage. A 750W motor on a 48V battery typically reaches 28–30 mph on flat ground. A 250W motor may only gain a few mph because it lacks the torque to push past its natural limit. Unlocking removes the software cap; it doesn’t change the physics.
Is it safe to ride at higher speeds?
Higher speeds increase stopping distance and reduce your reaction window. Before riding at 28+ mph, verify your brakes are in good condition, your tires are rated for the speed, and you wear a helmet. Consider upgrading brake pads if you ride hilly routes.
What if I want to restore the factory settings?
Reconnect the programming cable, open the software, and enter the original values you recorded in Step 2. Write the parameters back, and the bike returns to its factory behavior. Keep a copy of the original settings in a notes file for future reference.
Unlocking your Bionic controller is a straightforward process that removes artificial speed caps and gives you finer control over throttle response. The key is to make incremental changes, test after each write, and never exceed your motor’s current rating. With the right cable and a careful approach, you’ll have a bike that rides the way you want—without risking the components that keep it rolling.

Ryan Williams has spent over 8 years testing, repairing, and writing about electric bikes. He has personally ridden and reviewed 150+ e-bike models from brands like Lectric, Aventon, Rad Power, Super73, and dozens more.
Before founding EBIKE Delight, Ryan worked as a bicycle mechanic for 5 years at independent bike shops across California, where he specialized in e-bike conversions and electrical system diagnostics. He holds a Certificate in Electric Vehicle Technology from the Light Electric Vehicle Association (LEVA).
Ryan’s work has been cited by Electric Bike Report, Electrek, and BikeRumor. When he is not testing the latest e-bike on California backroads, he is in his workshop tearing down batteries and controllers to understand what makes them tick — and what makes them fail.
Areas of Expertise
E-bike performance testing and real-world range verificationBattery diagnostics, charging best practices, and safetyBrand comparisons: Lectric, Aventon, Rad Power, Super73, and moreError code troubleshooting across major e-bike systemsE-bike laws, registration, and compliance by state
Ryan believes every rider deserves honest, hands-on information — not marketing hype.